Account Settings
Create and manage the account in order to access to management console.
Note
In Business / Enterprise / OEM plans, the maximum number of account registrations (including API users) is determined by your contract. While it is possible to register beyond the limit, please be aware that our sales team will contact you later regarding the contract details.
Adding an account
-
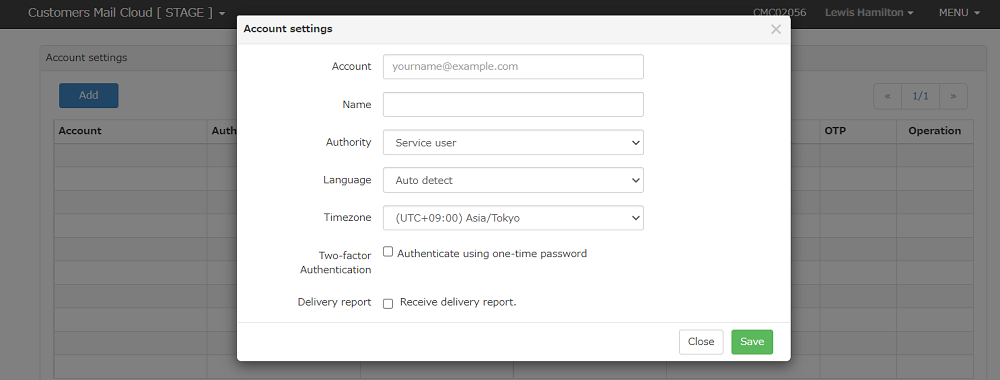
Click the account name on the top right of the management console, then choose "account settings" from the menu list.
-
Click the add button
-
Input the below items.
Item Required Description Account Yes Input desired email address and a temporary password will be emailed to the specified account address. Name Yes Input the user name of the account. Authorization Yes Select the authorization for this account. Service users can change all settings aside from account settings, payment and service plan. Users with Report viewing permission can only can change the delivery report. Accountants can only change the confirmation of the account statement. Language Yes The language of the account. Language settings are first set automatically to match your browser's language. Time Zone Yes This refer to the time zone of this account. The time zone is applied to the date when you output to the screen or CSV file on the management console. Two-factor authentication No Choose whether to perform two-factor authentication when this account logs in to management console. If checked, two-factor authentication is performed using a one-time password (OTP). A setup process is required when the user logs in for the first time using OTP enabled TFA. Delivery report No Choose whether you want to receive the delivery report mail or not. This function can not be used if the accountant is specified as the authority. Virus check
ProNo You can choose whether you want to receive the notification mail for the virus detection. This function can not be used if the report viewer or accountant is specified as the authority. This feature is not enabled by default. Operation authority No You can configure this account's permission to download files that include email addresses. Note that the download setting must also be active/enabled within Customers Mail Cloud. SAML Name ID No When performing Single Sign-On (SSO) with SAML authentication, set the NameID (linkage key information) registered with your Identity Provider (IdP). If this field is left blank, the value in the "Account" field will be applied.
*This field is only visible if the SAML authentication option is enabled.How to login when using SAML Yes Select whether to allow only Single Sign-On (SSO) via SAML authentication, or also permit traditional password login.
*This field is only visible if the SAML authentication option is enabled.Note
Virus detection function is only available for pro plan opiton. Please make sure to subscribe to the virus check option with Pro plan.
For virus checks in Business, Enterprise, or OEM plans, please send us an inquiry.
The 'SAML Name ID' and 'SAML Login Method' options will only appear if the SAML authentication feature is active/available for your use.
Warning
When you create or edit the user account, you cannot select "group administrator" role. If you want an account to upgrade to admin or to downgrade from admin, please request to our support center via webform on admin console.
After upgrading to group admin role, this admin account is invisible in the account list.
If 'SAML Only' is selected for the 'SAML Login Method,' Two-Factor Authentication (2FA) will be unavailable. Furthermore, a temporary password will not be issued after saving the account settings.
-
When clicking on the "save" button, account will be added.
Delivery Count Report
The delivery count report shows the number of valid deliveries per day from the beginning of the month to the previous day for each server configuration. Report mails will be send everyday around 8.
sandbox
----------------------------------------
2019-06-01      0
2019-06-02      0
2019-06-03      123
2019-06-04      50
2019-06-05      0
2019-06-06      0
2019-06-07      0
2019-06-08      0
2019-06-09      0
2019-06-10      0
2019-06-11      0
----------------------------------------
Total     173
Max       123


transactional-email
----------------------------------------
2019-06-01      128
2019-06-02      48
2019-06-03      2398
2019-06-04      328
2019-06-05      582
2019-06-06      235
2019-06-07      452
2019-06-08      35
2019-06-09      42
2019-06-10      2539
2019-06-11      325
----------------------------------------
Total      7112
Max        2539
Virus detection notification
Virus detection email will be send If a virus is detected. If there are multiple detections within 1 minute, one notification email will be counted in the number of detections.
======================================================================
This email send by Customers Mail Cloud automatically.
======================================================================

Thank you for using this service.

A virus mail was detected by the outgoing mail virus check.

Client number:CMC00000
Detection date and time:2020-09-03 20:07
Number of detection:1

Log in to management console and check the contents.
Login URL : https://console.smtps.jp/

※ Please contact below for further questions regarding this email.
======================================================================
HENNGE K.K.
Customers Mail Cloud Technical Support Center
E-Mail : hde-cm@hennge.com
======================================================================
Editing the account
-
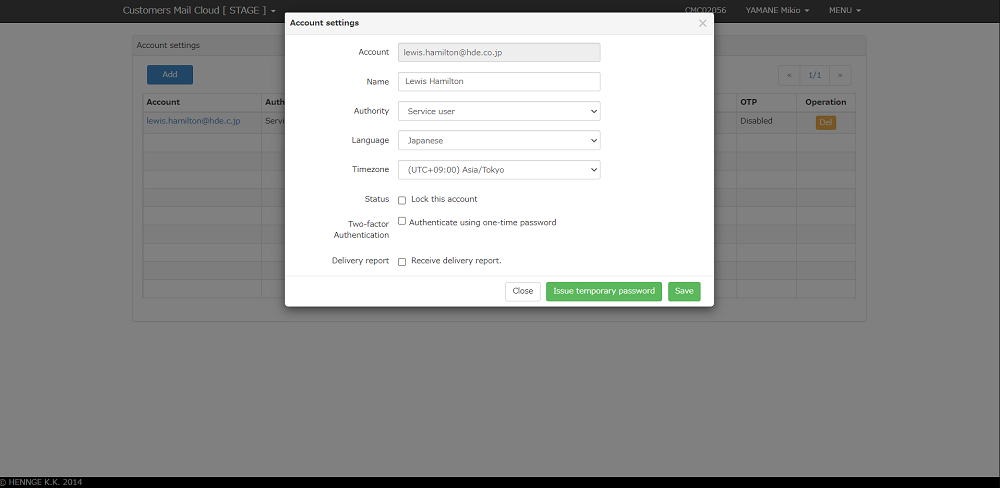
When clicking the account, editing dialog will be displayed.
-
Editing items after the inital save is possible. After editing the items, click the "save" button for the changes to take affect.
Login Method Update for SAML Users
If the user's "How to login when using SAML" is set to "SAML only", “Two-factor Authentication” will be unavailable, and the "Issue temporary password" button will be inactive.
When an account configured for "SAML Only" login is changed to "Password login possible" and saved, a temporary password will be automatically generated.
Issuing the temporary password.
-
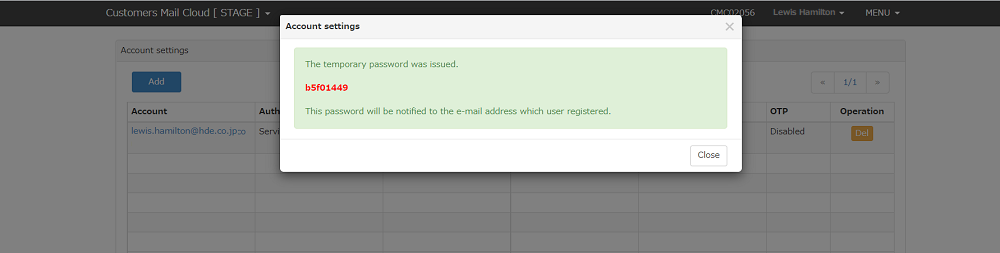
Click the "Issue a temporary password" button.
-
A temporary password will be displayed at the top of the screen.
Note
Issued temporary passwords will be sent to the account via email.
Reissuing the OTP key.
-
Click the "Issue the OTP Key".
-
Accounts that have their OTP keys reset are required to re-setup their OTP settings upon re-login.
-
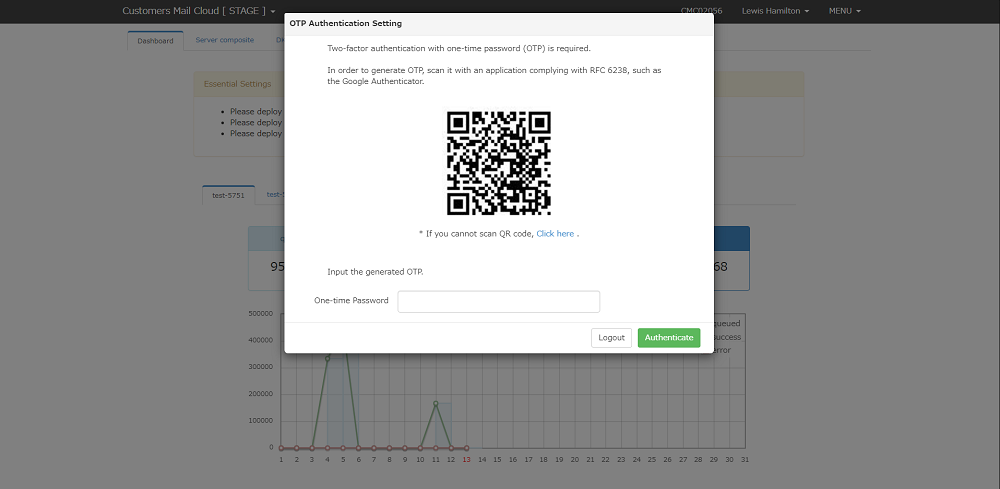
After loging into an accout whose OTP key has been reissued, a QR code will be displayed on the screen.
Scan the QR code with an RFC6238 algorithm compliant OTP generator such as the Google Authenticator. Input the OTP (6 digit number) created by the generator in the "one-time password" and click the authentication button to complete the OTP reset.
Locking the account
Clicking the "Lock this account" checkbox followed by the save button will making logging in with said account impossible.
Deleting the account
When you click the "delete" button on the account list, confirmation dialog will be displayed. When you input the password for the login account and click the "delete" account will be deleted.